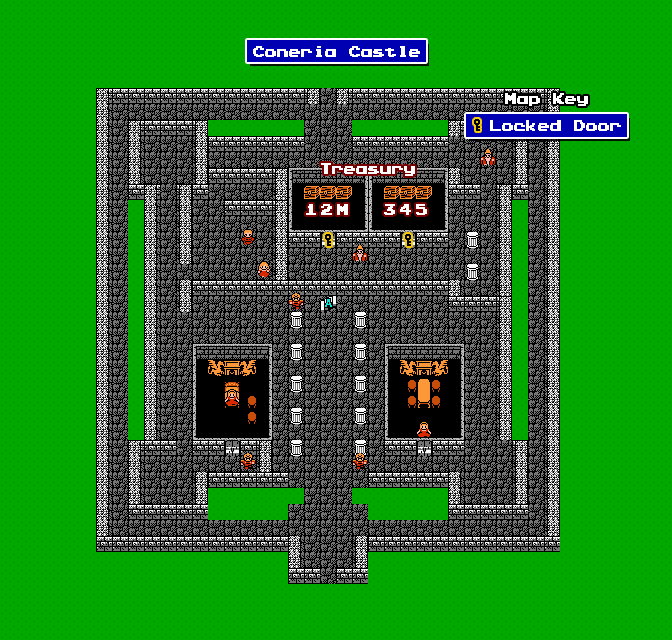
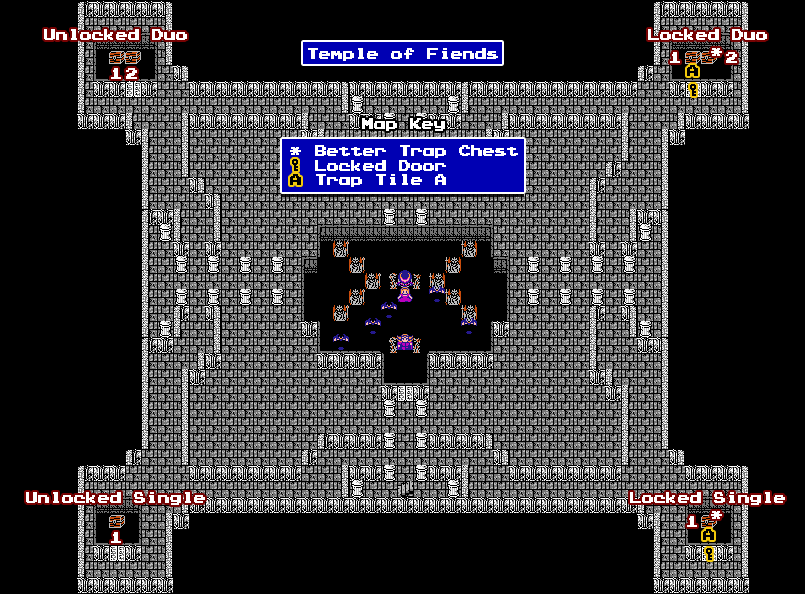
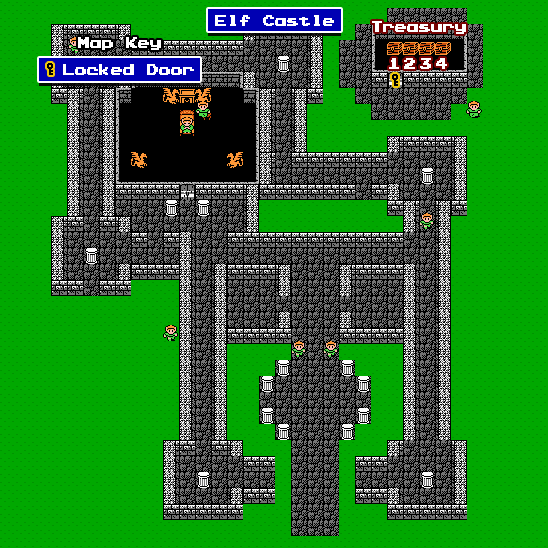
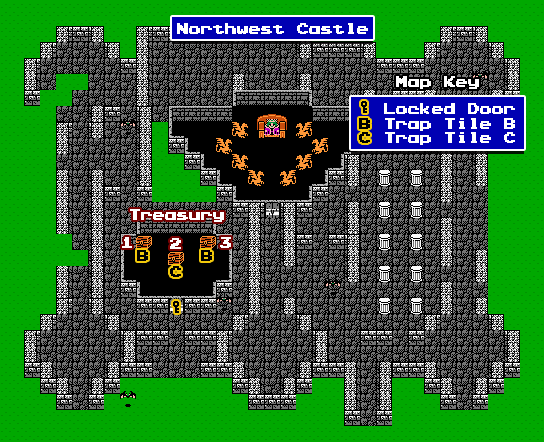
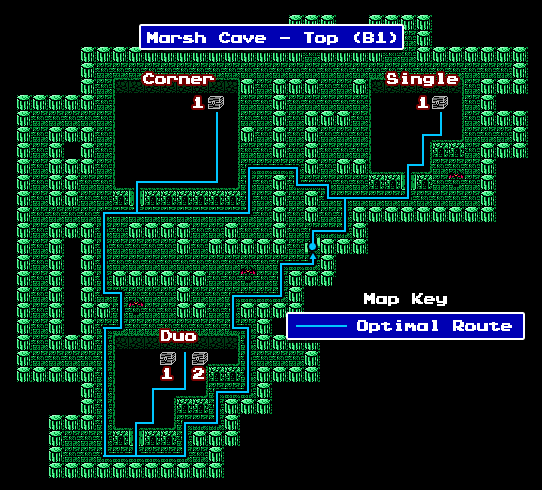
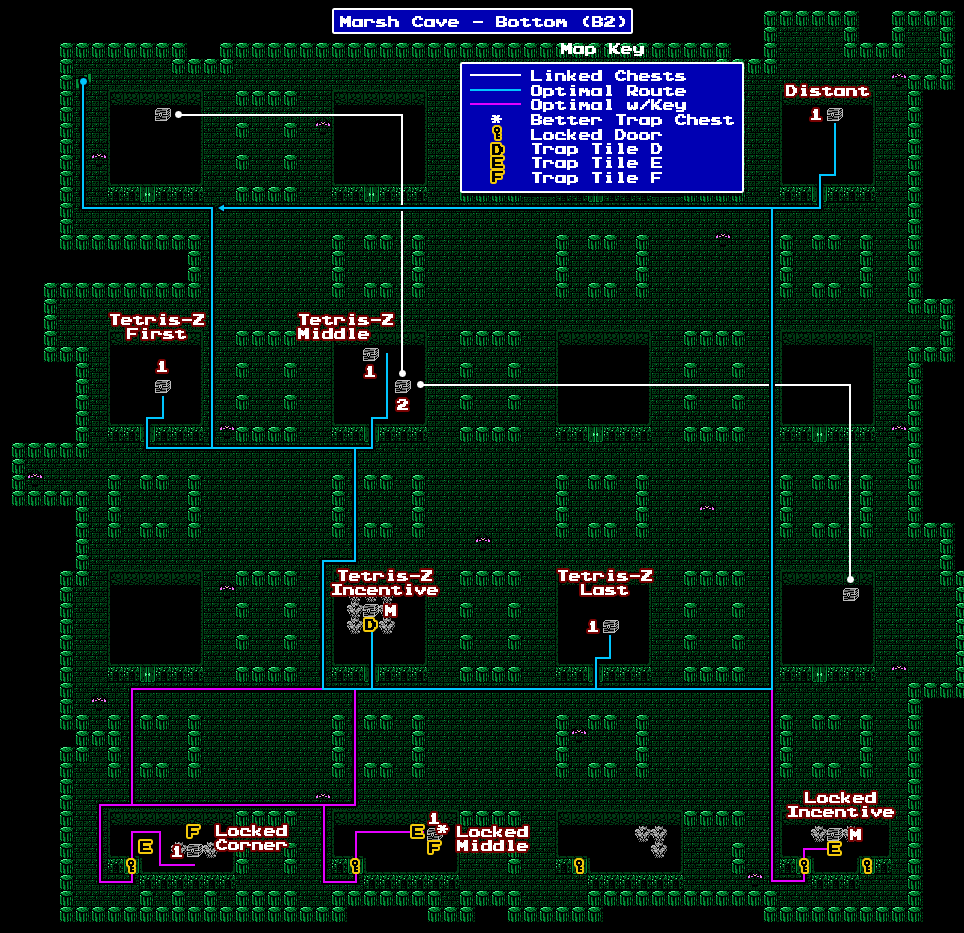
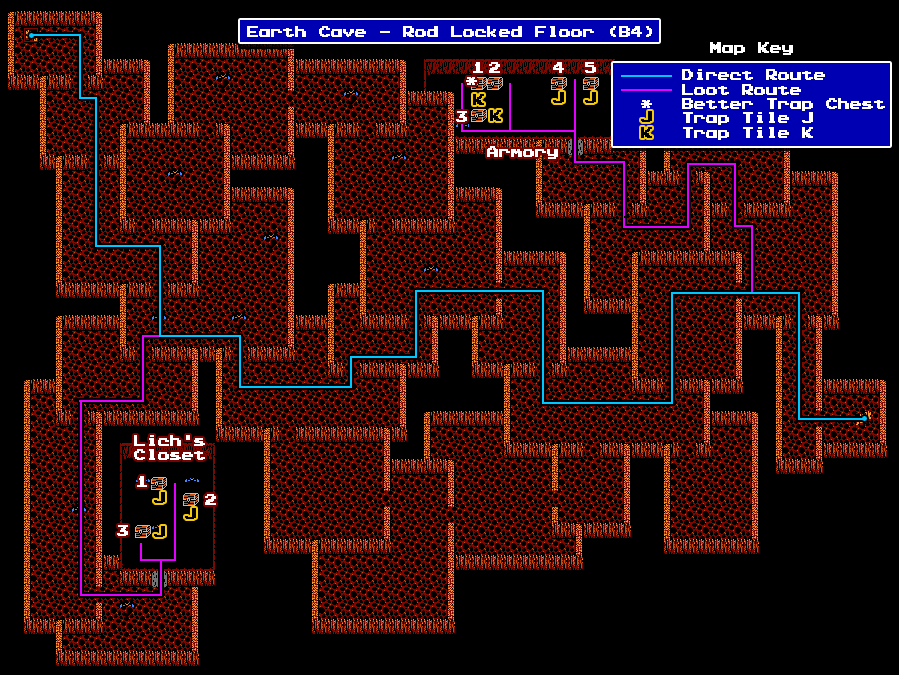
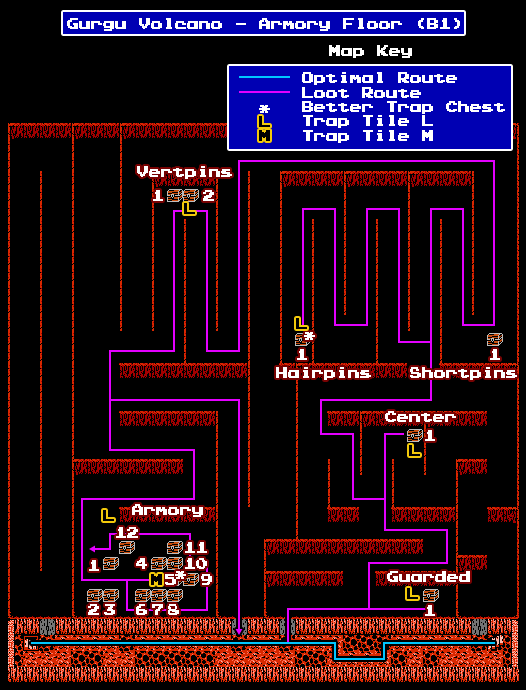
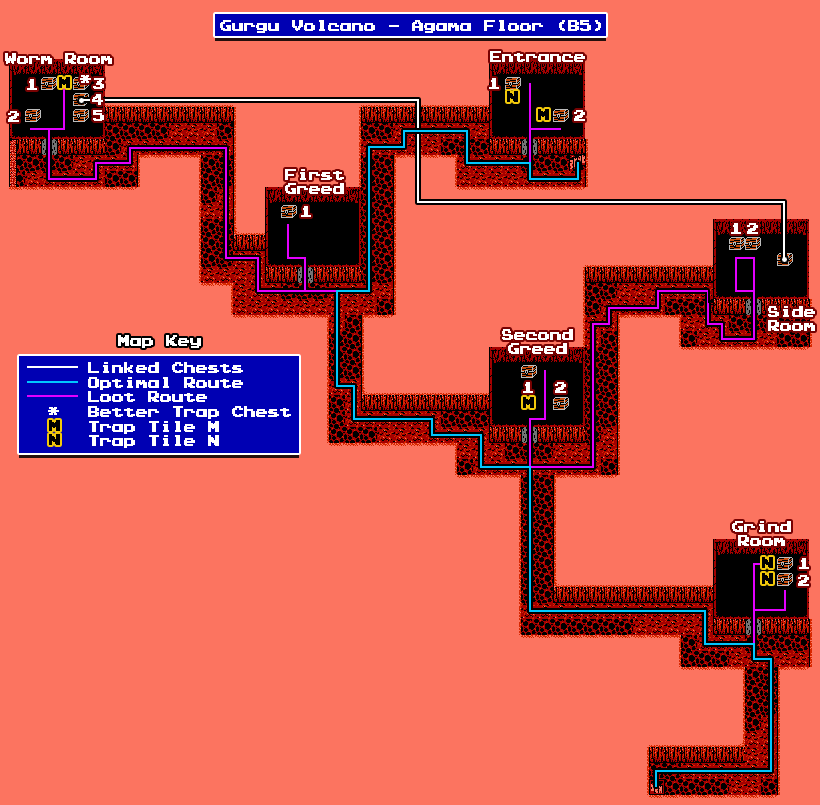
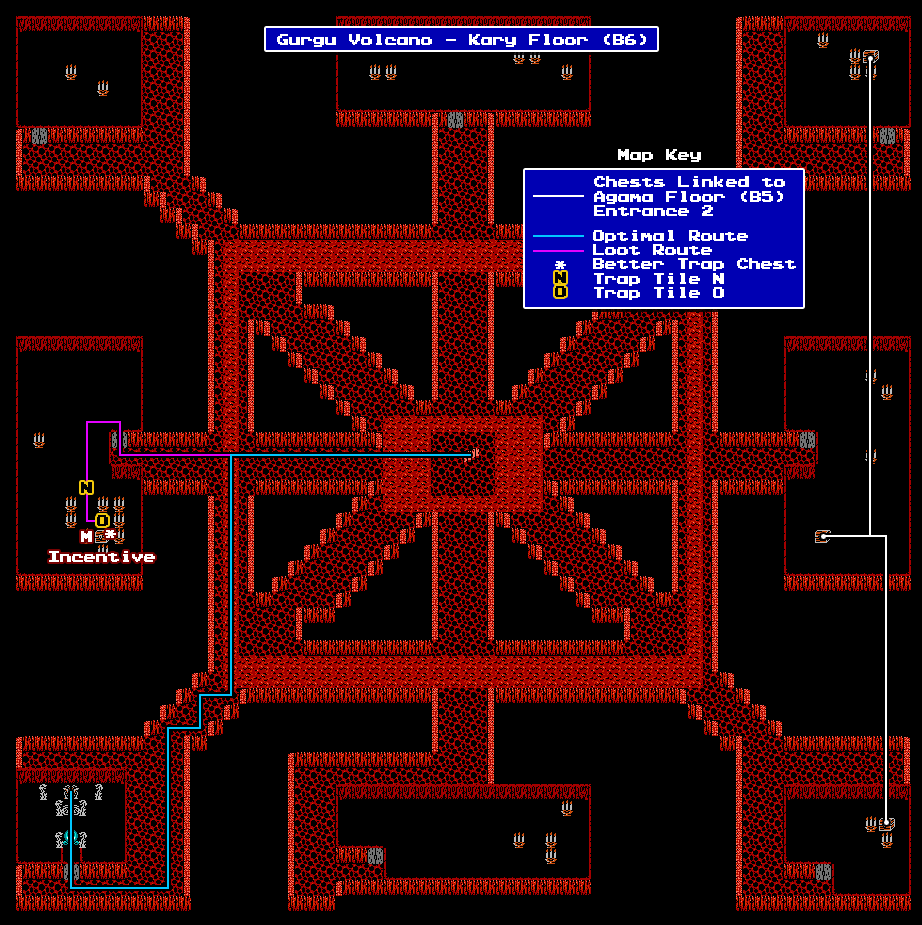
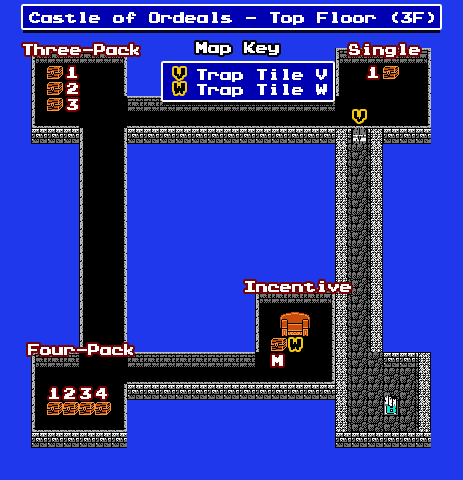
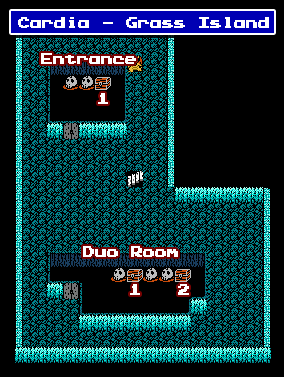
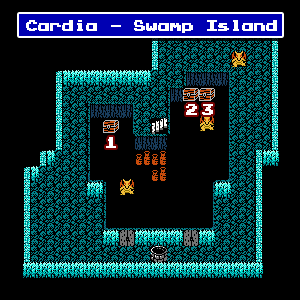
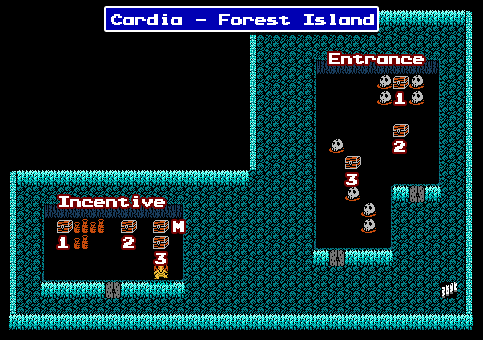
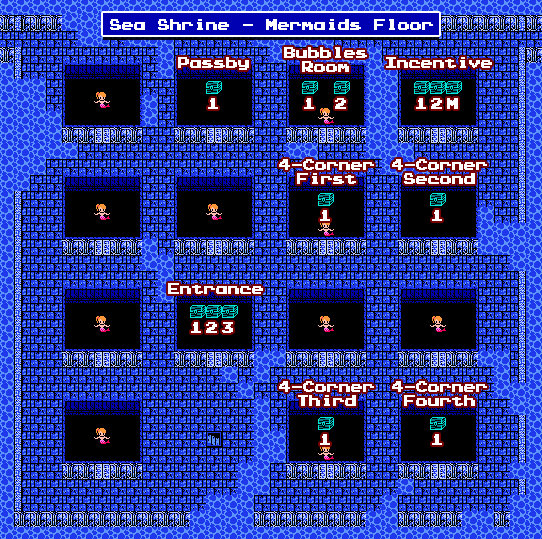
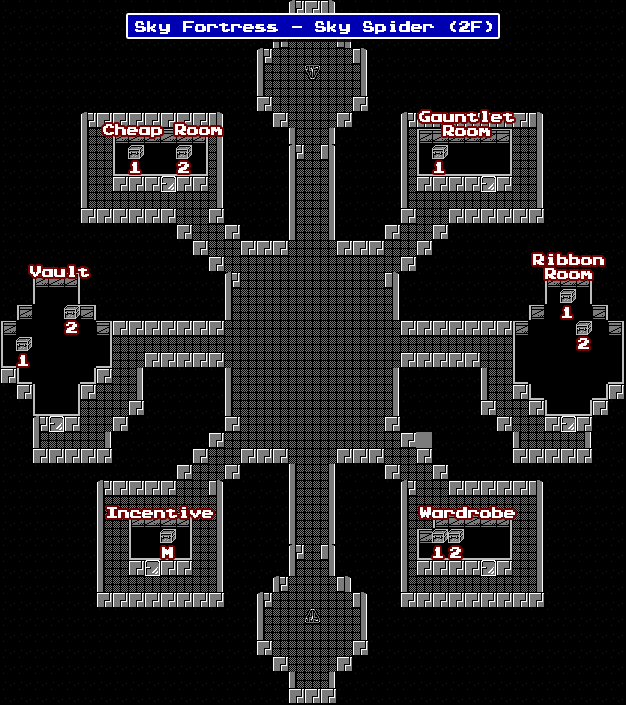
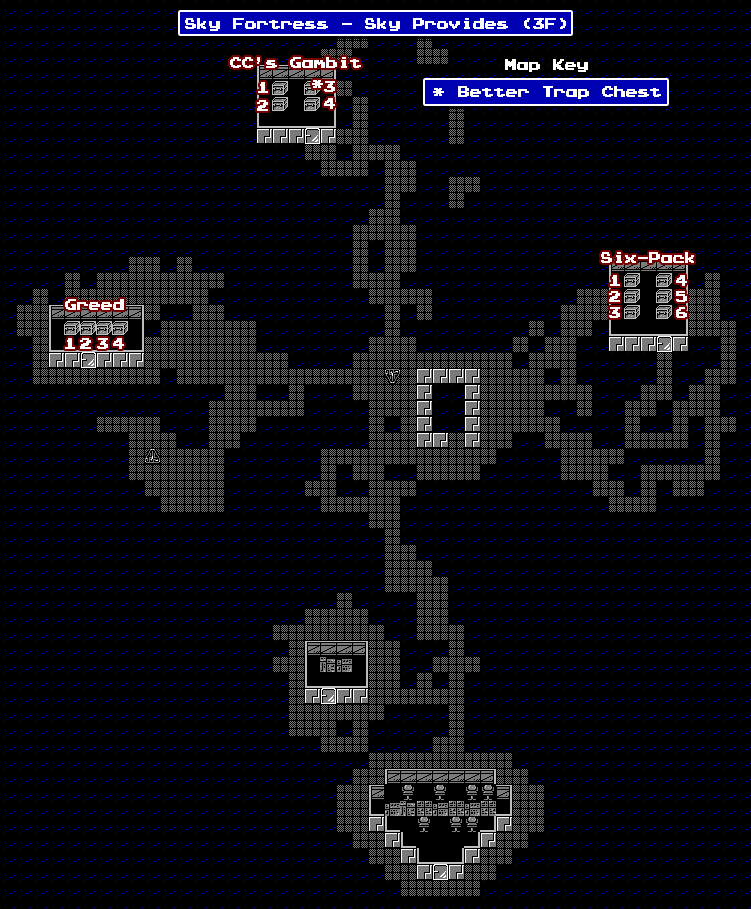
By default, chests in Final Fantasy for the NES aren't named, they're just programmatically defined. Chests in each dungeon will be numbered, but unless you understand the weird order of the program it's unlikely that knowing the chest number would help you find the right chest easily (where is Sea Shrine #25?). As such, FFR renames the chests, making them easier to find in any kind of text-based hint or tracking system (such as for Archipelago).
These maps provide a list of all chest locations, with the given name for those chests as well as their number in the system. The maps also provide guidance on linked chests, better trap chests (for good gear), and ideas on the best path to take for routing dungeon floors.
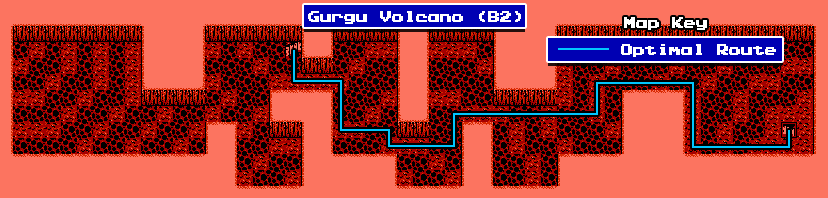
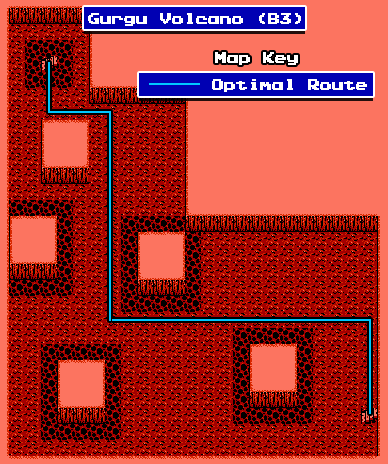
Note that routing floors is based on how many unsafe tiles a player has to cross to get to their goal (treasure rooms, the stairs to the next floor, and/or the boss of that dungeon). Unsafe tiles are tiles that can cause an encounter (based on the players spot in the encounter table). Safe tiles are tiles that do not cause an encounter, such as lava tiles, door tiles, and tiles along the bottom of any room with a door. Maximizing the number of safe tiles you take, along with minimizing unsafe tiles, will result in the best, fastest route through a floor.
Also bear in mind that trap tiles do not increase the encounter table (which is helpful when grinding on those tiles). Still, your optimal route through floors should minimize the number of trap tiles you take along your path.
¶ Town Routing
Elfland Magic Routing

¶ Vampire Blighted Towns
Coneria

Pravoka

Elfland

Restored Melmond

Crescent Lake

Onrac

Gaia

¶ Circle Sea Locations
Coneria Castle
Temple of Fiends
Matoya's Cave

Dwarf Cave

Elf Castle
Northwest Castle
¶ Marsh Cave
Marsh Top
Marsh Middle

Marsh Bottom
¶ Earth Cave
Earth B1 - Giants Floor

Earth B2

Earth B3 - Vampire Floor

Earth B4 - Rod Locked
¶ Titan's Tunnel

¶ Gurgu Volcano
Volcano B1 - Armory
Volcano B2
Volcano B3
Volcano B4

Volcano B5 - Agama Floor
Volcano B6 - Kary Floor
¶ Ice Cave
Ice Top - Exit Floor

Ice Incentive

Ice Short

Ice Bottom

¶ Castle of Ordeals
Ordeals Maze

Ordeals Top
¶ Cardia Islands
Cardia Grass
Cardia Swamp
Cardia Forest
¶ Sea Shrine
Sea Split

Sea TFC

Sea Mermaids
Sea Greed

Sea Sharknado

¶ Waterfall

¶ Mirage Tower & Sky Fortress
Mirage 1F

Mirage 2F

Mirage 3F

Sky 1F - Sky Plus

Sky 2F - Sky Spider
Sky 3F - Sky Provides
Sky 4F - Sky Maze

¶ Overworld Routing
Southern Continent to Airship Desert

Onrac to Temple of Fiends

Mirage Tower to Temple of Fiends

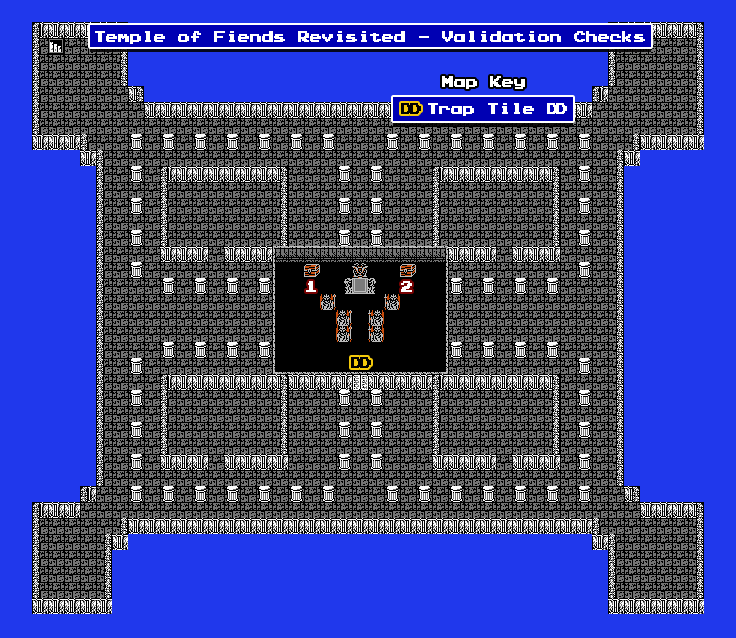
¶ Temple of Fiends Revisited
Validation Floor
Lich Floor

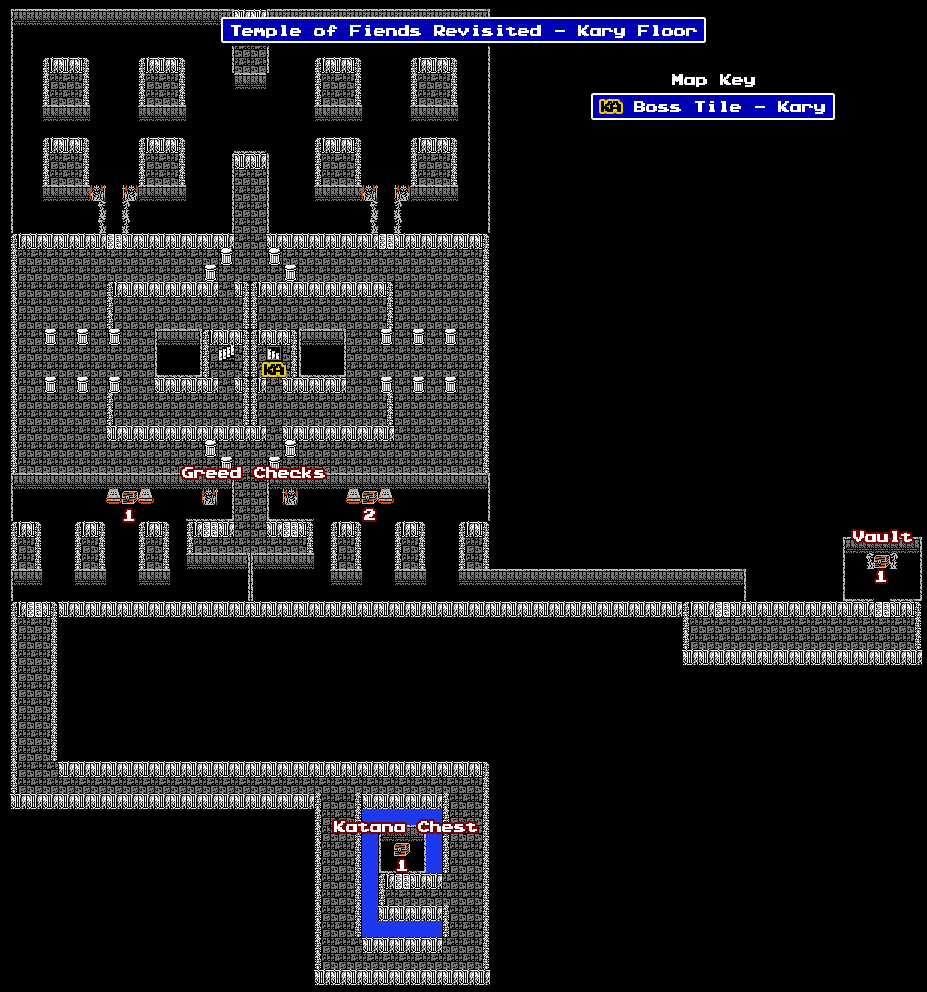
Kary Floor
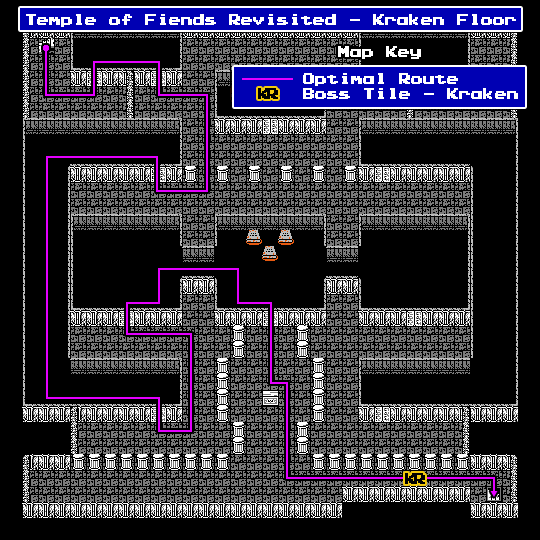
Kraken Floor
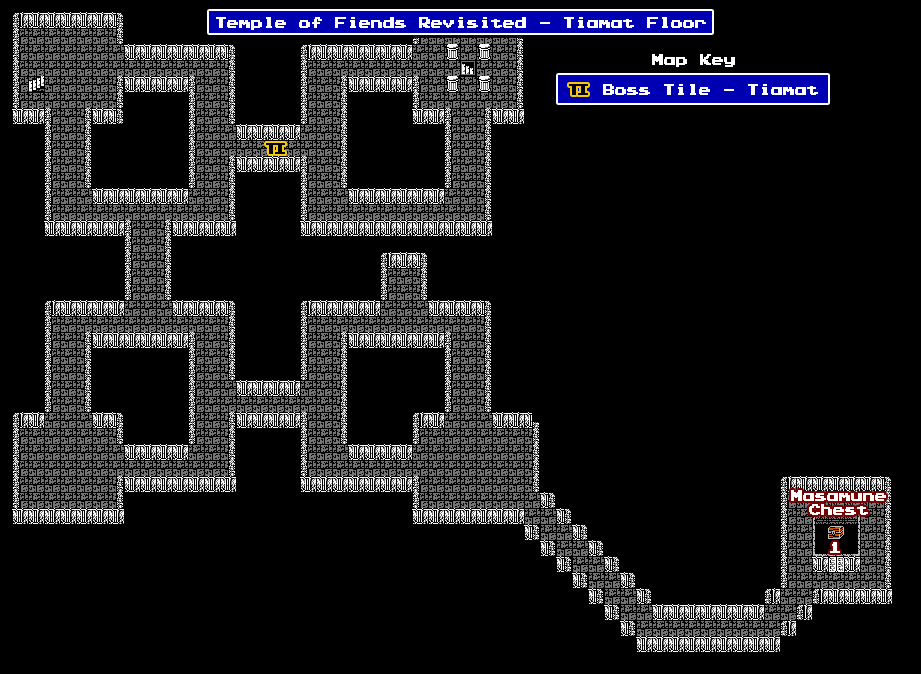
Tiamat Floor
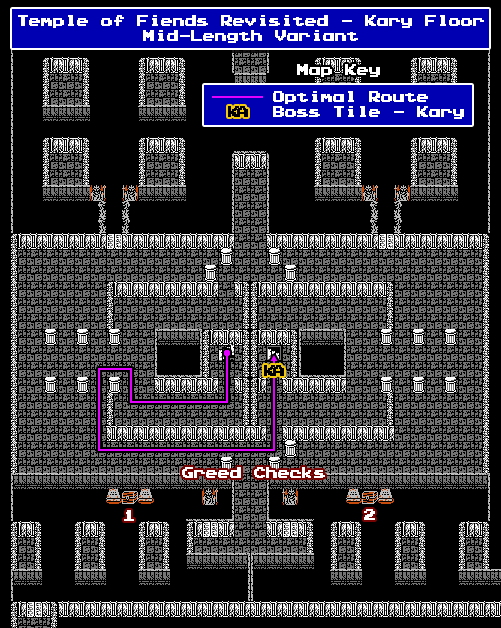
¶ Mid-Length Temple of Fiends
For the final dungeon of Final Fantasy, there are two lengths many players are used to: Long, which is the full dungeon as published in the original NES game, and Short, which takes the players from the Black Orb warp down into the Temple of Fiends Revisited, skipping all the floors and shoot the player down to the bottom floor where Chaos resides. But a third option is available, Mid, and this has its own set of wrinkles.
Mid-Length ToFR, simply called “Mid ToFR”, shunts the players from the Black Orb down the first of the fiend elemental floors Earth Floor, and then has them traverse the back half of the dungeon. But it's not a normal traversal because, along with cutting out the first few floors (and all the weird pathing along the many hallways), the elemental floors also have new shortcuts that have been added. These make traversing these floors substantially faster than before.
Lich Floor
Lich's floor will start you off where you expect, at the bottom left staircase. But as you're walking up you should immediately notice parts of the right wall that are missing, allowing you a path through the bottom of the floor. Instead of having to traverse up, and around, and back down, you can now stay along the bottom (hugging the top wall of this path so you can save two steps when you wall over door tiles, which are tiles that do not increment the encounter table) to get to the Lich fight tile (assuming fiend refights are on).

Kary Floor
This is another substantial shortcut, but also one that's easy to spot. As you're coming down from the left-center staircase you will note that the path from one side of the floor to the other that is normally blocked is now open. Instead of needing to go up, through the top room, and then come out and back around, you can skip all of this and go along the bottom-center path straight to the Kary fight tile.
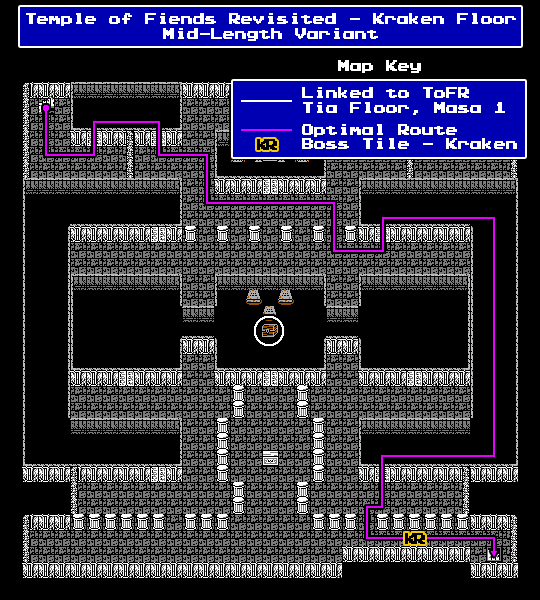
Kraken Floor
This one is the least direct shortcut as the path between one staircase and the other on this floor requires going across two corners of the map no matter what. You'll start in the upper left corner and you'll have to move to the bottom right corner to get to the Kraken fight tile. The path in vanilla is very twisty, and it's still somewhat complex here even for the shortcut. Instead of hooking left and curving in and around through rooms, you'll go far to the right, go through a different room, and then come out near the Kraken tile. This path, with shortcuts, is the shortest of all possible paths on this floor, clocking at 29 incremented steps.
Air and Chaos Floors
By default these two floors are so short they do not have shortcuts.